Thursday, October 24, 2019

New Lensbaby Omni Color Expansion Pack Magic!


      Last June I posted information about the new Lensbaby Omni system for shooting through, a fun tool set for making photos in a new and creative way. Today Lensbaby announced a new pack for the Omni system, the Omni Color Expansion Pack, and I have been lucky enough to be shooting with it for the last month. This pack contains a set of reflective colored film strips that allow you to add color and light to your subjects, some strips are textured and some are plain. I have been having a blast shooting with these and have definitely found the magic of Lensbaby once again!

     I spent some time shooting in my gardens, but the real magic happened for me when I shot raindrops on some leaves after a heavy rain, when I saw this image through my viewfinder I could barely breathe!


     Here is a shot of my set up with the Omni color film on my Velvet 85 as well as the actual subject, you can see why the image on the back of my camera showed me the magic of using these:


  I can change the color or temperature of the light across the entire frame, or add color to a particular area of my composition. Adding color allows me to lessen possible distractions, to simplify or add interest to my subjects.

     I have too many favorites to post them all here so I made a short video for you, all images were created with this new pack and my Lensbaby Velvet 85, so much fun and I love the effect!


Happy Shooting!
Kathleen


Tuesday, July 30, 2019

New Education Website


Hello there!

I just finished building a website for all of my education resources, kathleenclemonseducation.com. Now you can find links for my classes, workshops, books and videos all in one place. More content will be coming. You can find it here.

I also wanted to tell you about a new class I am writing this summer, Flower Portraits: Capturing the True Beauty of Flowers will start in November at Gather Academy. I am having a blast shooting, filming and writing lessons for the class.

This class will be a celebration of everything I have learned and taught about flower photography over the last 13 years. There will be new content, images and videos, and in each lesson you will get the behind the scenes story of one of my photos. I'll take you through my process from the location to the final image. I'll also be including post-processing lessons for flower photography for the first time. Weekly assignment critiques will be delivered via videos. I am really excited about this new class, I hope you'll join me!

I also want to tell you that I will no longer be teaching online classes at the Bryan Peterson School of Photography. If you are interested in one of the classes I taught there, please contact me directly and I will arrange a private session for you.

My best,
Kathleen

Friday, June 28, 2019

Omni Bonding


Last week Lensbaby introduced the Omni System, an incredibly creative way to shoot through objects placed in front of your lens. Now, instead of holding the object yourself, you can easily move, change angles, combine and switch objects out quickly and easily with any lens. Check out the above link for more info and details on what is included with this system.

Whenever I am testing a new product, it takes me a little time to figure out what it can bring to the kind of work I do. Though I have been amazed by the portraits taken using the Omni system, I needed to see if I could utilize it with the close up nature photography that I love. I am happy to tell you that I am having a ball with it, bending light and selectively blurring areas of the frame has been lots of fun!

I first tried the Omni system with my 180mm and 24-70mm lenses and made some fun images:


I was especially excited when Lensbaby recently sent me a step up ring so that I could try the system with my Velvet 85, and I spent yesterday morning experimenting with that combination and can tell you that I definitely bonded with it. Painting with light is a blast!

I used several different wands, but my favorite images were with the Stretch Glass and Triangular Prism Effect Wands used together. I kept the Velvet 85 on f/2.8 for all of these photos.


It's always good to push yourself to try something new, the Omni system helped me to create some very unique images and definitely earned a place in my camera bag.

Happy Shooting,
Kathleen

Sunday, February 24, 2019

Frozen Flowers


Over the last few weeks, I have been working on photographing flowers frozen in water. I have tried this before with varying degrees of success but really wanted to devote some time to it this winter. I have found a method that works well for me and am happy to share some tips with you.

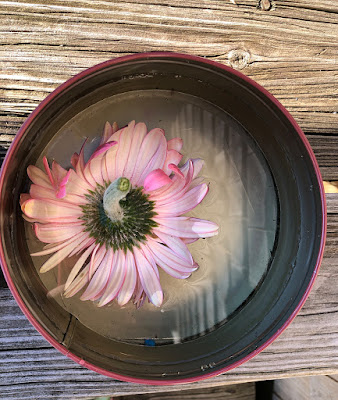
First, find a suitable container. Some people choose glass, I tried that as well as metal tins and plastic containers and found no difference. I knew I would not be shooting through the sides of the container, so glass was not a necessity, use what you have. I used some small containers for single large flowers and groups of smaller blossoms, and larger tins for bigger groups of flowers. Even a cut-off milk jug will work.


Collect some flower blossoms and trim the stems to fit the container you have chosen. The beauty of freezing the flowers is that you don't have to use pristine blossoms, I used both fresh and spent flowers and both worked well. I had better results with larger flowers.


Place the flowers in the container and add a little bit of water, you can place them with the blossoms up or stems up, or even sideways. The flowers will float if you add too much water, you really just want enough for the flowers to adhere and stop moving in the beginning, 1/2-1 inch is enough. Once you have added the small amount of water, place the container in the freezer. Here in Maine, I can place the containers outside to freeze when I run out of freezer space.


Check the progress after a few hours and add more water. Don't add too much at once or your slim ice layer will melt with the added water and the flowers will float free, it is better to keep adding frequent small amounts at a time until the flowers are covered with water. Sometimes I like to leave a few petals above the water/ice line for added interest in the photos.


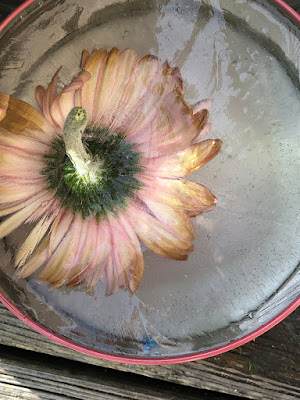
 It is always a surprise to see how the flowers look when frozen, no two look the same! I generally photograph them in the container first, shooting straight down with my lens parallel to the surface of the ice. I place the focus on any petals above the ice, and use an aperture of f/11-f/16. I use natural light, and have made photos with my 180mm, my Lensbaby Velvet 85 and my iPhone.


Once I am happy with the photos I made shooting straight down at the flower, I place the container upside down in a warmer location so that the ice will loosen (you could also run the container under warm water).  I remove the container and check the bottom and all sides of the ice block for interesting effects and make more photos from those angles. Shooting the ice block with backlighting works well too.


It's also interesting to photograph the flowers as the ice forms and/or begins to melt away, here are a couple I left outside overnight:


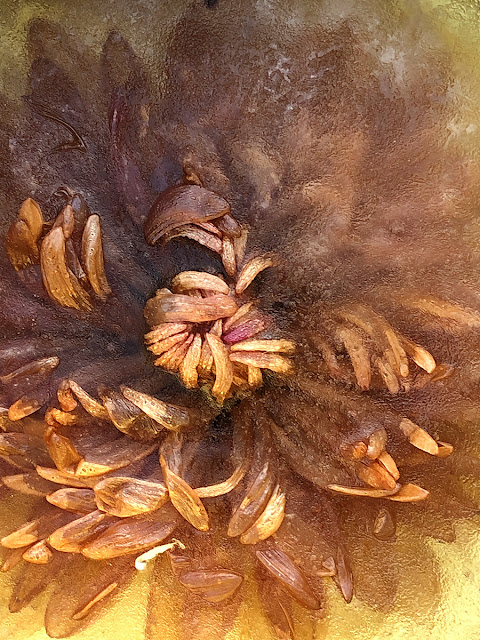
I found that some flowers turned brown when frozen, and some retained their natural colors. If you are unhappy with the color of the flower in ice, you can always convert to black and white or add a color tint as I did with this one:


I feel like I am only beginning with this technique and look forward to more experimentation and exploration, I have a full pan of red roses almost ready to shoot in my freezer right now so stay tuned.

Happy Shooting!
Kathleen