Thursday, September 6, 2012

Autumn Foliage Photography Tips


I know it's just early September, but here on the coast of Maine I am already seeing leaves beginning to turn, fall foliage season will be here before we know it! I'm excited, Autumn is my favorite season. Here are a few tips to help you capture nature's most colorful season right from the beginning.

~Check online foliage reports to find peak foliage in your area so you'll know just where to go to find the strongest areas of color.

~Plan on shooting early in the morning or late in the afternoon for warmer lighting, you'll want to avoid the contrast of harsh mid-day light.  I prefer to shoot early in the morning to catch any early morning mist which adds mood, and dew can add detail to any macro images you shoot. In late Autumn, early morning also brings the chance of frost, sometimes even snow here in Maine!
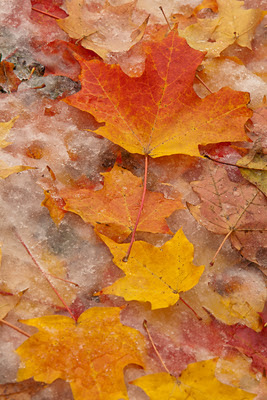


 ~Blue skies are a beautiful contrast to warm foliage colors. Thing about using your polarizer to reduce glare and deepen colors.  Polarizers are also great for shooting wet leaves.

~Overcast lighting will saturate colors and make them pop, and it eliminates highlights and harsh shadows. Just don't include any empty white sky in your composition.

~Foggy days can really add mood to your foliage photos.


~Look for contrasts in color such as one branch of brightly colored leaves against an evergreen background, one colorful leaf surrounded by others which haven't turned yet, small amounts of color remaining where all else has gone brown... really look for interesting color combinations and contrasts.


~Look for colorful reflections, the leaves don't always need to be the main subject.


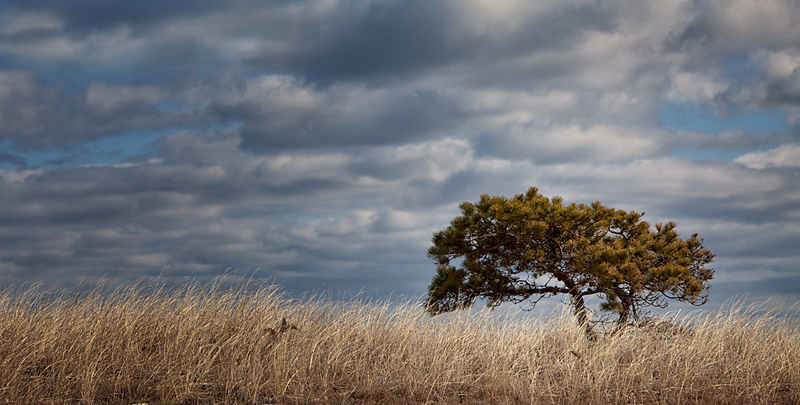
~On a windy day, try using a slow shutter speed on moving leaves for a more Impressionistic photo. 


You can also move your camera with that slow shutter speed to create an  abstract image.


~Create your own scenes with beautiful leaves you find, have fun with your photography!


~Try shooting backlit leaves to bring out the veining detail.


~Shoot from wide angle to macro, from that vast landscape to a single leaf. Look up, look down, really work each scene. As with any subject, look carefully all around your viewfinder for anything that does not add to the image, so that you can remove it before you click the shutter. As my students are used to hearing me say, "If it doesn't add, it needs to go!"


Enjoy this very special time of year!
Happy Shooting!
Kathleen


Saturday, July 14, 2012

Work it!


Hi there everyone!

With summer flowers popping up everywhere here in Maine, I thought I'd share a few quick tips for photographing flowers. When looking at flower subjects, most photographers focus on the top of the blossom. That's totally understandable, most of the interesting parts of a flower are on the top, and I concentrate on this area often often.


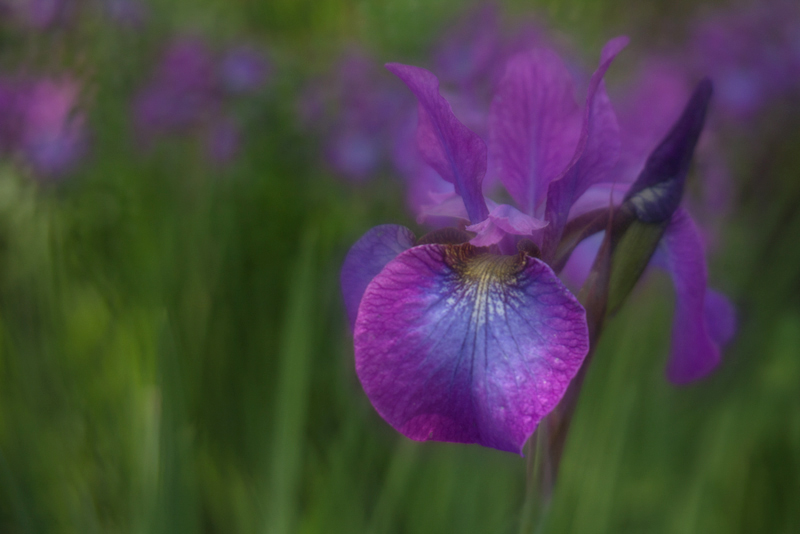
But- if you are only photographing the tops of flowers, there's much you are missing!  Sometimes the most interesting aspect of a flower is on the side, or even the backside! Look closely at the flower from all angles, see what catches your eye, what you want to highlight and share with your audience. Definitely shoot that top of the flower, but then move on to other points of view. Shooting from several different angles allows you to tell more than one story about the flower, so, as my students are used to hearing me say, "Work it!".


 Be sure you shoot verticals as well as those horizontals, especially if the flower has a long stem, or a slim shape. As always, be particularly aware of the light on your subject, the background, and simplify whenever possible to keep the attention on your subject.


Happy shooting!
Kathleen
Friday, April 27, 2012

Nik Radio Interview


I had a blast being interviewed by Scott Sheppard on Nik Radio this week, talking primarily about my Flower Photography and Lensbabies, two of my favorite subjects. Click here to have a listen on iTunes, or here to stream the interview on Nik Radio's webpage.


Happy Shooting!
Kathleen


Wednesday, April 25, 2012

Multiple Fun!


As a Canon shooter, I have had a bit of Nikon envy since I first saw Bryan Peterson make a multiple exposure photo right in his camera back in 2004. I loved the effect and really wanted to be able to do it with my camera. Yes, I could make a bunch of exposures and combine them in Photoshop, but that wouldn't allow me to see what I had captured at the time and make adjustments, and to be honest, it just sounded like too much work.

So, fast forward to early this Spring, when Canon announced the 5D Mark lll. I was reading through the new features, not really thinking it was time to upgrade my 5D Mark ll, when I read "new Multiple Exposure feature", and I was sold! I have been having a blast with it, and the technique is so easy to do! You just set the camera on Multiple, choose the number of exposures (I have been using 9), find a subject with lots of line and color and start shooting! I usually place my focus point off center, but it you like a more centered swirl, that's fine too. Rotate the camera (I went clockwise) with each exposure, turning just a bit each time you click the shutter. The results are different every time I do it, but to me that's part of the fun! Here are some images I made this morning, all at f/11. I shot Bleeding Hearts, a Magnolia tree, and Daffodils.


  I have just scratched the surface with this technique and am really looking forward to seeing what I can do with it.

Happy Shooting!
Kathleen


Friday, March 30, 2012

Seeing Beyond the Obvious


When you shoot a particular subject often, the challenge becomes capturing that subject in new and different ways. I had this issue last week when my Crocuses began to bloom. Here in Maine, Crocuses are the first bits of color we see in the Spring, and after a long season of just  brown and white, it's always a pleasure to see them break ground. I shoot them every year, and last fall I planted some large groups of purple Crocus bulbs in a new location, so I was especially happy to see them blooming.  

I always shoot some individual portraits....


... and of course some group photos....


So, how would I shoot this new crop of Crocuses in a different way? First I shot one group photo...


..and then I though about shooting through one group to another several feet away, keeping my lens very close to the flowers and shooting wide open to create a veiling effect...


Since we are having an early Spring, my daffodils are also up, so I tried shooting through their foliage too, and the resulting image was exactly what I had been seeking, a very different view of a commonly photographed subject. This is one of my new favorite photos!


So, grab your camera, get outside and try seeing your world in a new and different way!

Happy Shooting!
Kathleen

Thursday, March 1, 2012

Backgrounds


Choosing a background is as important as choosing a subject to photograph. The background can either enhance your photo or distract from your subject, so choose wisely! When you are composing, train yourself to carefully look all around the subject for anything that does not add to the story you want to tell. My students are quite used to hearing me say, "If it doesn't add, it needs to go!". You are responsible for everything in your composition, it's your choice to include elements or not to include them, so you cannot just say, "It was there". :)


So, if you are looking through your viewfinder and see a distracting element, what can you do to eliminate it?

1. You can move. Try a different angle, move up, crouch down, move left/right, see if a slightly different point of view removes the distraction. Try zooming in or moving in closer, sometimes that is all you need to do.


2. If the distraction is small, like a piece of grass, a weed or something you can move,  you can physically remove it. Clothespins are wonderful for pulling weeds, grass and other small items out of the way without damaging them.


3. You can try a larger aperture or a longer focal length to blur that distraction. If your camera has a Depth of Field preview button, use it! Experiment with aperture selections until you find one that gives you the depth of field needed for your main subject, but also creates blur where needed.


4. If you are shooting a close up, you can substitute a new background. You can use fabric, foam core, cardboard, an out of focus photo printed in a large size... the possibilities are endless. The blue background in this spider web shot is my jacket, it's hiding a background full of lines that drew attention away from the web pattern.


When shooting flowers, I sometimes choose the background before I pick my main subject. A blast of color in a flower garden can catch my eye, and then I just need to chose a subject and angle that incorporates that background into my photo.  If there isn't anything nearby I can use as my main subject to take advantage of the background, I sometimes add my own. For the image below, I used a daisy I'd brought along on my morning walk, I just clipped it to a tall stalk of grass with a clothespin and then made this photo.


Here are some other shots I made by choosing my background first:


Paying close attention to the background will make your photos much stronger, try it and see!


Happy Shooting!
Kathleen